
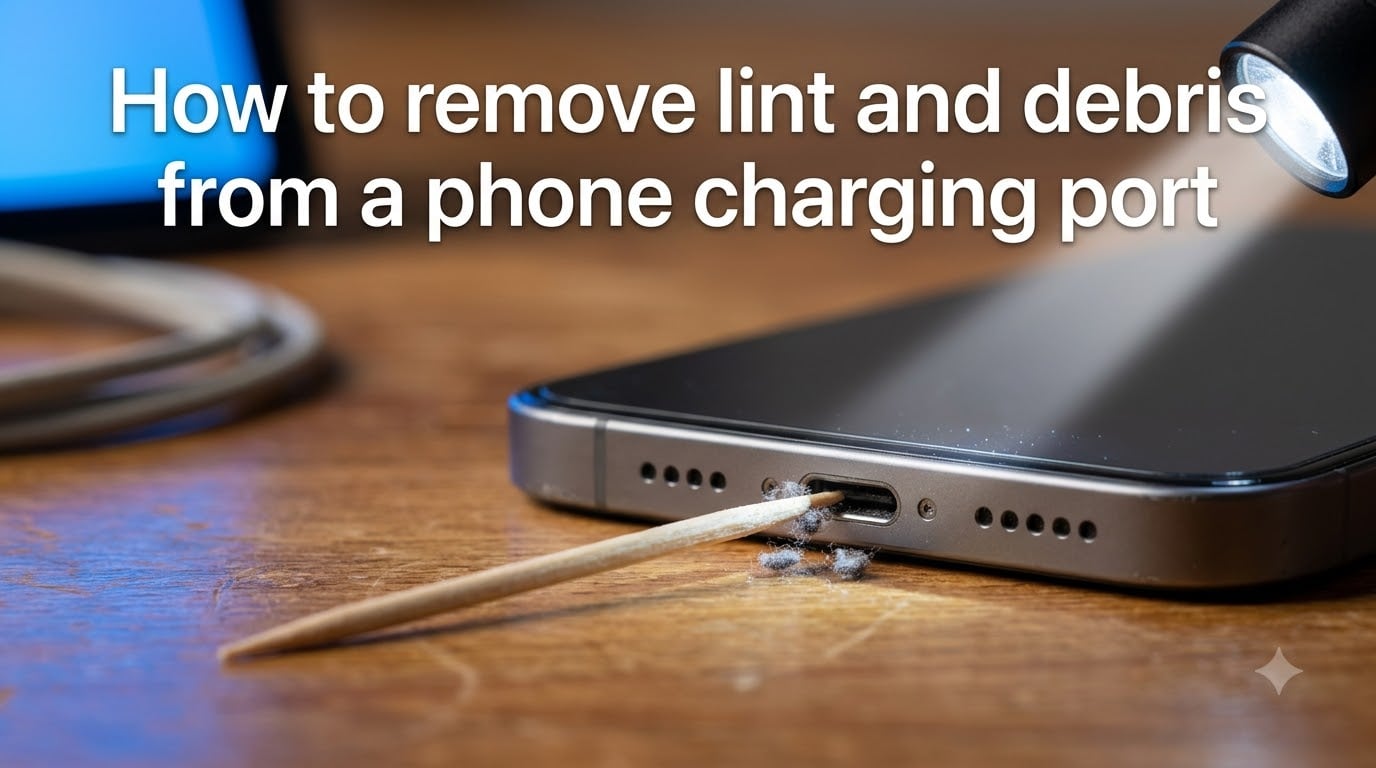
If your phone suddenly stopped charging or the cable feels loose when you plug it in, there is a very good chance pocket lint is the culprit. Learning how to remove lint and debris from a phone charging port can save you an expensive repair bill or an unnecessary upgrade. I have cleaned dozens of charging ports over the years, and in nearly every case the fix took under five minutes with simple household tools.
The problem is surprisingly common. Every time you slide your phone into a pocket or bag, tiny fibers, dust, and particles get pushed into the charging port opening. Over weeks and months, that debris packs down tightly against the charging pins until the cable can no longer make solid contact.
The good news is that you can safely clean your charging port at home as long as you use the right technique and avoid a few common mistakes that actually cause damage. This guide walks through everything step by step.
Table of Contents
Why Lint and Debris Accumulate in Your Charging Port?
Charging ports are essentially small traps for debris. The USB-C port and Lightning connector on your phone are recessed openings with exposed metal pins inside. Every time the port faces downward or rubs against fabric, particles get pushed in.
Pockets are the number one source of lint buildup. Denim and cotton fibers shed constantly, and when you push your phone into a tight jeans pocket, those fibers get jammed directly into the port opening. The charging cable then compresses the lint further each time you plug in, packing it into a dense wall against the connector pins.
Bags, purses, and backpacks contribute their own dust and debris. If you work in environments with sawdust, metal shavings, or fine particles, those materials accumulate even faster. I have talked to people in fabrication shops whose charging ports filled with metal dust so quickly that the phone stopped charging within weeks.
Both USB-C and Lightning ports are affected. USB-C ports tend to trap slightly more debris because of their wider, shallower design, but Lightning ports compact lint just as tightly against their smaller pin array.
Signs Your Charging Port Needs Cleaning
Most people do not realize their port is dirty until charging problems appear. Recognizing the early warning signs can help you fix the issue before it escalates into a complete charging failure.
The most obvious symptom is a cable that wiggles or feels loose when plugged in. When lint packs into the bottom of the port, the charging connector cannot seat fully. If your cable used to click in firmly and now rocks back and forth, debris is almost certainly the cause.
Other common signs include:
Phone charges intermittently or only at certain angles
Charging speed drops significantly compared to normal
You see a “moisture detected” or “accessory not supported” warning
The phone only charges when you press down on the cable
You can visibly see compacted material inside the port when you shine a light
If you notice any of these symptoms, grab a flashlight and look inside the port. A bright LED phone flashlight aimed across the opening will reveal compacted lint as a fuzzy, often gray or blue layer filling the bottom of the connector.
Tools You Need (and Tools to Avoid) for Safe Cleaning
Having the right tools makes the difference between a clean port and a damaged one. The charging pins inside your port are tiny and delicate, so anything sharp, metallic, or conductive can destroy them permanently.
Safe Tools to Use
Wooden or plastic toothpick – The gold standard. Wood and plastic are non-conductive and soft enough that they will not scratch the pins.
Plastic dental flosser pick – The flat plastic tip works well for scraping compacted lint from the port edges.
Compressed air can – Useful for blowing out loose dust after you have loosened the compacted layer. Use short bursts only.
Bulb syringe or camera cleaning blower – A non-pressurized alternative to compressed air that many people prefer for delicate electronics.
Cotton swab with isopropyl alcohol (70 percent or lower) – Lightly dampen the tip, do not soak it. Useful for cleaning residue after lint removal.
Bright flashlight – Essential for seeing what you are doing inside the dark recess of the port.
Tools to Absolutely Avoid
These are the tools that cause the most charging port damage. Several of them come up constantly in forum threads from users who ruined their phones.
Metal sewing needles and pins – Conductive and sharp. A needle can short the charging pins instantly or scratch the contact surface permanently. I have seen Reddit users report dead ports after a single needle cleaning attempt.
Metal paperclips – Same problem as needles. The risk of electrical shorting is real even with the phone powered off.
Safety pins and SIM ejector tools – Metal again. These feel convenient but they are one of the fastest ways to damage the connector.
High-pressure air compressors – Shop air compressors deliver far more pressure than a canned air product. The blast can push debris deeper or damage the moisture-detection mesh inside USB-C ports.
Liquids and water – Never pour or spray liquid directly into the port. Even small amounts can trigger moisture warnings or cause corrosion.
Sharp plastic from cut objects – If you cut a plastic item to make a tool, the freshly cut edge can be sharp enough to damage the pins.
How to Remove Lint and Debris from a Phone Charging Port: Step-by-Step
This is the core process I use every time. Follow the steps in order and work slowly. Rushing is how damage happens.
Step 1: Power off your phone. This is non-negotiable. Powering down eliminates any risk of electrical shorting while you work inside the port. Hold the power button and shut the phone off completely before touching the opening.
Step 2: Shine a bright light into the port. Use your phone’s flashlight or a dedicated LED to inspect the interior. You are looking for compacted lint packed against the back wall of the connector. Note how deep it goes so you know what you are working against.
Step 3: Gently scrape with a wooden toothpick. Insert the toothpick straight in, then carefully drag it along the back wall of the port where the lint is packed. Use a light sweeping or hooking motion to pull debris toward the opening. Do not dig, stab, or apply force. The lint should come out in small clumps.
Step 4: Work around the edges of the port. Move the toothpick gently along each side wall to loosen debris trapped in the corners. Rotate the toothpick slightly as you go so you are always pulling lint outward rather than pushing it deeper.
Step 5: Blow out loosened debris. Once the compacted layer is broken up, use a few short bursts of compressed air or a bulb syringe to clear the loose particles. Hold the phone with the port facing downward so gravity helps the debris fall out.
Step 6: Repeat and inspect. Check the port with your flashlight again. If lint is still visible, repeat steps 3 through 5. Stubborn compacted debris sometimes takes three or four passes to fully remove.
Step 7: Clean residue with isopropyl alcohol if needed. If there is sticky residue or you want to finish with a clean contact surface, lightly dampen a cotton swab with 70 percent isopropyl alcohol and gently wipe the port opening. Let it dry completely before powering on or charging.
After cleaning, plug in your cable. It should seat firmly with a satisfying click. If charging resumes normally, you are done.
Cleaning Without Special Tools: DIY Alternatives
One of the most common questions in phone help forums is how to clean a charging port when you do not have compressed air or even a toothpick on hand. There are a few household alternatives that work, though some come with caveats.
The rolled paper method: Take a plain sheet of paper and roll one corner tightly into a thin point. The paper point is soft, non-conductive, and firm enough to scoop out loosely packed lint. This is my go-to when traveling without tools.
The interdental brush: If you have soft-pick interdental brushes for dental care, the smallest size can work well for sweeping the port edges. Make sure it is clean and dry before use.
The cotton-wrapped toothpick: Wrap a tiny amount of cotton around the tip of a wooden toothpick. This gives you a soft, lint-grabbing surface that can pull debris out of tight corners. One Reddit user described wrapping cotton on a toothpick for one to two seconds of gentle contact at a time.
The hot glue method: This technique circulates widely in forums but requires caution. You fill the port with a small amount of hot glue from a low-temp glue gun, let it cool for a few seconds until firm but not fully hard, then pull it straight out. The glue grabs the lint and pulls it out. The risk is that glue can break off inside the port or get too hot, so I recommend trying other methods first.
Floss and string: Plain dental floss (unwaxed, no flavor coating) can be gently worked along the port edges to dislodge debris. Keep it dry and use a light sawing motion.
Critical Safety Warnings: What NOT to Do?
Every forum thread about charging port cleaning includes stories of people who made things worse. Here are the mistakes that cause permanent damage.
Never use metal tools. Needles, pins, paperclips, and SIM ejector tools are the leading cause of destroyed charging ports. One wrong move can bend or break a pin, and that damage is not repairable without a full port replacement.
Never blow into the port with your mouth. Breath carries moisture and saliva. Even a small amount of liquid inside the port can trigger moisture-detection warnings on modern phones and potentially cause corrosion over time.
Never use a powered air compressor. The pressure from a shop compressor is dramatically higher than canned air. It can force debris deeper into the port or damage the internal moisture barrier. Stick to short bursts from a regulated canned air product or a manual bulb blower.
Never dig aggressively. If the toothpick meets resistance, do not force it. Pull back, change your angle slightly, and try again with less pressure. The pins inside the port are mounted on a fragile flex connector that can be dislodged by rough handling.
Never pour alcohol or any liquid directly into the port. Alcohol should only be applied to a cotton swab first, and the swab should be barely damp, not wet. Liquid pooling inside the port can cause immediate problems.
Prevention Tips to Keep Your Port Clean Longer
Cleaning your port once is not a permanent fix. If you carry your phone the same way, the lint will come back. A few simple habits can dramatically reduce how often you need to clean.
Use a port cover or dust plug. Small silicone plugs that fit into the charging port cost very little and block nearly all debris. They are the single most effective prevention tool. The only downside is remembering to remove the plug before charging.
Carry your phone port-side up. When you put your phone in a pocket, orient it so the charging port points upward rather than toward the bottom of the pocket. This simple change prevents lint from being pushed into the opening.
Use a phone case with port protection. Some case designs include a hinged or sliding door over the charging port. These are especially useful if you work in dusty or industrial environments.
Clean your pockets regularly. Turning pockets inside out and removing accumulated lint reduces the supply of debris available to pack into your port.
Consider wireless charging. If your phone supports Qi wireless charging, using it as your primary charging method means the port stays closed and unused most of the time. You will still need occasional wired charging, but the port stays much cleaner.
When to Seek Professional Repair?
If you have thoroughly cleaned the port and your phone still will not charge, or if the cable still feels loose after removing all visible debris, there may be physical damage to the connector or the internal charging board. A professional repair shop can inspect the pins under magnification and test the charging circuit.
You should also seek professional help if you notice burn marks, a burning smell, visible corrosion, or if the port moves when you plug in a cable. These indicate damage beyond simple debris accumulation.
FAQs
How to get stuck debris out of phone charging port?
Power off the phone, shine a light into the port, then use a wooden toothpick to gently scrape along the back wall where debris is packed. Use a hooking motion to pull lint outward, then blow out loose particles with compressed air or a bulb syringe. Repeat the process until the port is clear and the cable seats firmly.
What happens if dust gets in your charging port?
Dust and lint block the charging cable from making proper contact with the connector pins. This causes slow charging, intermittent charging, a loose-fitting cable, and eventually complete charging failure. In rare cases, conductive debris like metal dust can short the pins and damage the charging circuit.
Can I put rubbing alcohol in my charging port to clean it?
Never pour or spray alcohol directly into the port. Instead, lightly dampen a cotton swab with 70 percent isopropyl alcohol and gently wipe the port opening to remove residue. The swab should be barely damp, not wet, and the port must dry completely before you power on or charge the phone.
How does lint get in my charging port?
Lint enters the port every time your phone rubs against fabric in pockets, bags, or purses. Denim and cotton fibers shed constantly, and when the phone is pushed into a tight pocket, those fibers get jammed into the port opening. The charging cable then compresses the fibers further each time you plug in.
Wrap-Up
Knowing how to remove lint and debris from a phone charging port is one of those skills that pays off every few months. A wooden toothpick, a flashlight, and five minutes of patience can fix a phone that seemed destined for the repair shop.
The key takeaways are simple: power off first, never use metal tools, work gently from the edges inward, and let any alcohol dry completely before charging. If you make port cleaning part of your routine every couple of months and add a dust plug to your daily carry, you can keep charging problems away for the life of your phone.
If you found this guide helpful, share it with someone whose phone has been acting up. The fix is almost certainly hiding at the bottom of their charging port.