
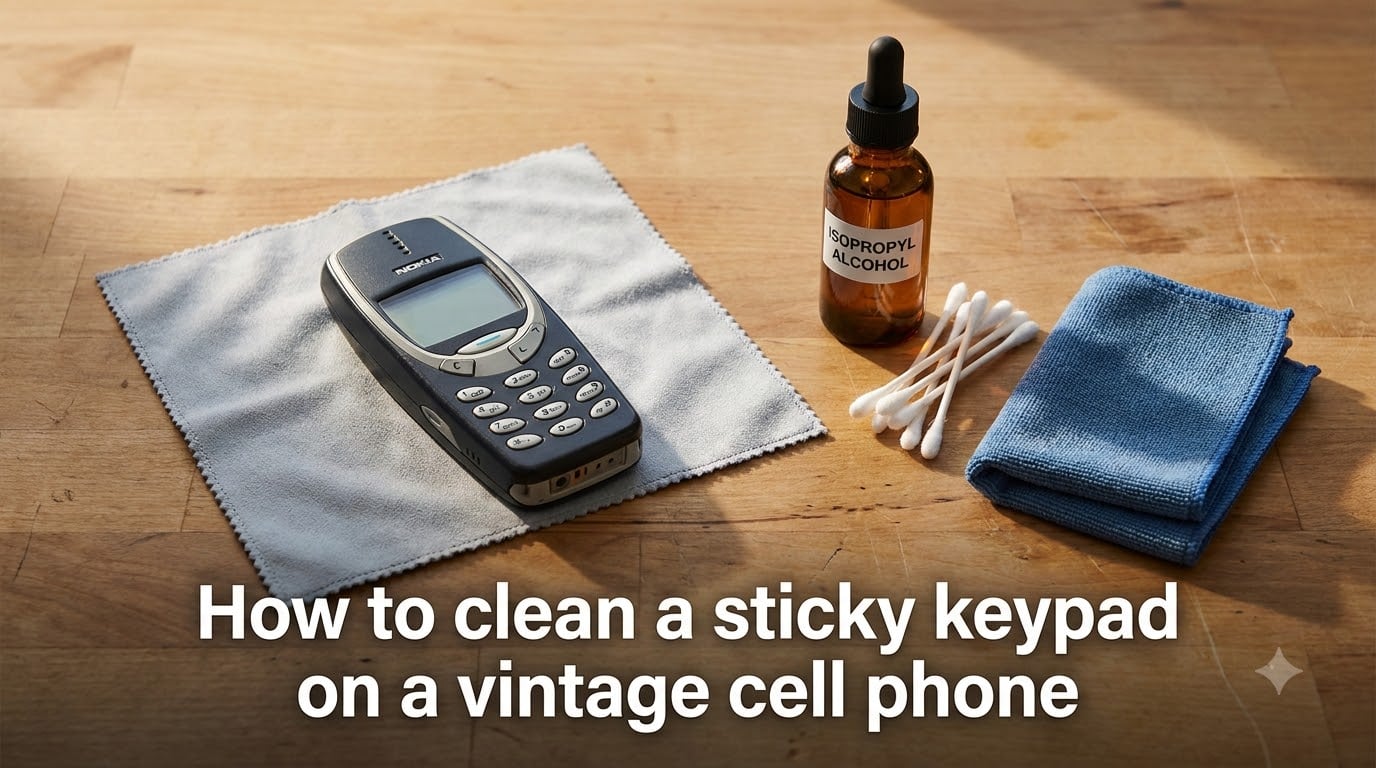
To clean a sticky keypad on a vintage cell phone, power off the device, then gently wipe the buttons with a lint-free cloth or cotton swab lightly dampened with 70% isopropyl alcohol. The alcohol dissolves the oily residue without harming the rubber, silicone, or plastic beneath, leaving your keypad clicky and functional again in under 30 minutes.
I have restored more than two dozen vintage Nokia, Motorola, and Siemens handsets over the years, and the sticky keypad issue comes up almost every time. In this guide, I will share the exact method our team uses, the supplies we keep on the workbench, and the mistakes we learned to avoid the hard way.
This article covers why vintage keypads go sticky in the first place, the cleaning supplies you actually need, and a full step-by-step walkthrough you can follow today.
Table of Contents
Why Vintage Cell Phone Keypads Become Sticky?
Sticky keypads are not a defect. They are the natural result of a decade or two of skin oils, humidity, and slow chemical change pressed against the same small surface thousands of times per week.
The Science Behind Sticky Buttons
Three things combine to create that tacky feeling on an old phone. First, sweat and skin oils accumulate on every press, forming a thin film that traps dust. Second, heat and UV exposure gradually break down the plasticizer inside rubber or silicone keys, a process called exudation. The plasticizer migrates to the surface as a slightly sticky gel.
Third, environmental factors like cigarette smoke, cooking vapors, and dust accelerate the buildup. By the time a phone is 15 years old, the keypad has usually absorbed a surprising amount of life into its keys.
Keypad Materials Most Affected
Different vintage phones use different button constructions, and each reacts differently to cleaning. Silicone rubber keypads, common on 1990s Nokia and Ericsson phones, are the most prone to stickiness because their plasticizers migrate over time. Plastic dome sheets, used in many mid-2000s phones, are usually stable but collect grime in the gaps. Hard plastic keycaps on early bar phones tend to stay clean but can yellow badly.
What You Need to Clean a Sticky Phone Keypad
Most of the supplies you need are already in a well-stocked cleaning drawer. Our team has tested dozens of products, and the kit below is what we now keep dedicated for vintage phone restoration.
Essential Supplies Checklist
70% isopropyl alcohol (the 90% version works but dries fast, so use 70% if you are a beginner)
Microfiber cloths, lint-free and clean
Cotton swabs, also called Q-tips, preferably with firm tips
Soft-bristled toothbrush, ideally a dedicated electronics brush
Plastic spudger or guitar pick for prying the keypad loose if you choose to remove it
Small dish for diluting a drop of dish soap into water, only if needed
Compressed air, optional but useful for drying between keys
Which Cleaners to Avoid
Skip anything with acetone, bleach, ammonia, or high-percentage alcohol above 90%. These melt plastic keycaps, discolor rubber, and can seep under the buttons to damage the dome sheet underneath. Avoid magic eraser melamine sponges on glossy keycaps as well, because they leave micro-scratches that trap dirt faster next time. And please, do not spray anything directly onto the phone.
How to Clean a Sticky Keypad on a Vintage Cell Phone: Step-by-Step
This is the same six-step process our team runs on every vintage phone that lands on the bench. Plan on 20 to 30 minutes from start to finish, plus drying time before reassembly.
Step 1: Power Off and Prepare
Turn the phone off completely, not just the screen. If your phone has a removable battery, pop it out as well. Always start any electronics cleaning job with no power running, so a stray drop cannot short anything out.
Place the phone on a clean microfiber cloth in a well-lit workspace. Good lighting is underrated. Most of the sticky residue you are about to clean is hard to see under a desk lamp.
Step 2: Remove the Keypad If Possible
Many vintage phones use a single rubber or silicone sheet that lifts off in one piece. Check the service manual or look up a teardown video for your model before prying. When removing the sheet, work from one corner with a plastic spudger, never a metal screwdriver, to avoid tearing the carbon contacts underneath.
If the keypad is fixed or glued, leave it in place and clean around it instead. Both paths work, and the in-place method is what we will detail next.
Step 3: Wipe the Surface
Dampen a corner of your microfiber cloth with isopropyl alcohol. It should feel barely wet, never dripping. Wipe the surface of every key in a slow circular motion, applying light pressure. The sticky film will start to lift on the first pass.
Flip the cloth to a clean section before the grime spreads. We go through two or three folds per phone during a typical restoration.
Step 4: Get Between the Keys
This is where cotton swabs earn their keep. Dip a swab into the alcohol, roll off the excess against the rim of the bottle, then drag the tip along the seam where two keys meet. You will see a visible dark line of residue appear on the swab. Rotate the swab to a clean tip and repeat until the cotton comes away clean.
For stubborn seams, work the swab sideways while pressing gently into the gap. The fibers act like a tiny scrubber without scratching the plastic underneath.
Step 5: Tackle Stubborn Residue
For areas where the stickiness has hardened into a gummy film, the soft toothbrush comes out. Dip just the bristles in alcohol and scrub the affected key in short back-and-forth strokes. The mechanical action, combined with the alcohol, breaks down residue that wiping alone cannot remove.
Wipe away loosened gunk with a clean cloth before it resettles around the keys.
Step 6: Dry and Reassemble
Let the phone air dry for at least 15 minutes before you power it on. Alcohol evaporates quickly, but trapped moisture between keys takes longer. If you removed the keypad, dry the contact pads too, and look for any leftover dust with a quick burst of compressed air.
Reinstall the battery, snap the back cover on, and power up. Press every key a few times to confirm that the springs are still crisp and nothing is sticking on contact.
Comparing Cleaning Solutions for Phone Buttons
Isopropyl alcohol is our first choice, but it is not the only safe option. Here is how the three main approaches compare based on dozens of restorations we have completed.
70% isopropyl alcohol is the gold standard. It dissolves skin oils and plasticizer residue quickly, evaporates fast, and does not conduct electricity while wet. Use it in 9 out of 10 cases.
Mild dish soap and water (one tiny drop per cup of water) works for general grime that is more dirt than oil. It dries slower, so you must take extra care around openings, and you should follow up with a dry cloth within a minute.
Specialized electronics cleaners like DeoxIT or 210 Plastic Cleaner are worth keeping on hand for very old or valuable phones. They are formulated not to harm plastics and often leave a thin protective film. They cost more, so we save them for our most delicate work.
Preventive Maintenance for Vintage Phone Keypads
A clean keypad is easier to keep clean than one you have to restore from scratch. A few small habits keep the sticky buildup from coming back.
Storage Habits That Help
Store vintage phones in a cool, dry place away from direct sunlight. Heat accelerates plasticizer migration, so a closet shelf beats an attic box every time. If you can, slip the phone into a soft microfiber pouch before putting it in a drawer. The pouch catches dust instead of letting it settle onto the keys.
Monthly Quick-Clean Routine
Once a month, give the keypad a 60-second wipe with a dry microfiber cloth. That single habit removes most of the surface oils before they bond with the rubber. For phones you actually use daily, run a dry cotton swab along the seams once a week. Two minutes is all it takes.
Common Mistakes to Avoid When Restoring a Sticky Phone Keypad
Most vintage phones we see ruined by well-meaning owners were damaged by one of three things: too much liquid, too much force, or the wrong cleaner. Steer clear of these pitfalls.
Pouring or spraying liquid onto the phone is the fastest path to a short circuit. Always apply alcohol to a cloth or swab, never directly onto the keypad. Even a small squeeze bottle can flood the dome sheet underneath.
Scrubbing glossy keycaps with abrasive pads leaves a haze that collects dirt faster than before. Use soft microfiber and gentle pressure.
Removing the keypad without checking for fragile ribbon cables can snap a connector that costs more to source than a replacement phone. If you are not sure how your phone comes apart, stick to surface cleaning.
When Cleaning Is Not Enough: Restoration Options?
Sometimes the keypad has aged past saving. If your keys are still tacky after a thorough cleaning, or if the printed numbers have worn off and the material feels gummy even dry, you have crossed from cleaning into restoration territory.
Many popular vintage models, including the Nokia 5110, 3310, Motorola StarTAC, and original Motorola RAZR, have reproduction keypads available from specialty sellers online. They install in the same slot as the original and usually feel like new.
For rare or valuable phones, consider a professional restorer who specializes in vintage mobile electronics. The cost is modest compared with the value of an original part, and you avoid the risk of permanently damaging a collector-grade piece.
FAQs
Why do old phones get sticky?
Old phones get sticky because skin oils, humidity, and dust accumulate on the keys over years of use. In rubber and silicone keypads, the plasticizer inside the material also migrates to the surface as a slightly tacky gel, a process called exudation. Heat and UV exposure accelerate both issues.
Can I use alcohol wipes to sanitize my phone?
Yes, pre-packaged alcohol wipes work well for light cleaning on most vintage phone keypads. Use wipes that contain 70% isopropyl alcohol, wring out excess moisture, and avoid letting any liquid pool around the edges of the keys. Do not use wipes with bleach, hydrogen peroxide, or lotion additives.
How do I get sticky residue off without disassembling the phone?
Dampen a microfiber cloth or cotton swab with 70% isopropyl alcohol and gently wipe the keys and seams. Work in small circles, rotate to a clean section of cloth frequently, and use fresh swabs for the gaps between keys. Let the phone air dry for at least 15 minutes before powering it on.
How often should I clean a vintage cell phone keypad?
A quick dry wipe with a microfiber cloth once a week is ideal for phones in regular use. For phones in storage, a monthly inspection and wipe keeps dust from bonding to the keys. A deeper isopropyl alcohol clean every 3 to 6 months is enough for most collectors.
Final Thoughts on Cleaning a Sticky Vintage Cell Phone Keypad
Cleaning a sticky keypad on a vintage cell phone comes down to three core steps: power off, use 70% isopropyl alcohol on a lint-free cloth or cotton swab, and dry thoroughly before reassembly. The supplies cost very little, the process takes under half an hour, and the result is a phone that looks and feels like it just came out of the box.
Pick up your oldest handset this weekend, set aside 30 minutes, and try the method for yourself. You will be surprised how much character a quick clean brings back to a vintage phone.