
There is nothing more frustrating than pointing your remote at the TV, pressing the power button, and getting absolutely nothing. Whether you are trying to watch the big game or just wind down after work, a dead remote can stop your evening cold. The good news is that most remote control failures are fixable at home in under 15 minutes with items you already have lying around.
In this guide, we will walk you through exactly how to fix a remote control that stopped working, step by step. From the simplest battery swap to advanced DIY repairs like the aluminum foil button trick, we cover every common cause. Our team has tested these methods across dozens of remotes, from basic IR models to smart Bluetooth remotes from Samsung, LG, and Roku.
Before you toss that remote in the trash or order a replacement, try these fixes first. You will save money and probably be surprised at how often a simple cleaning or contact restore brings a seemingly dead remote back to life.
Table of Contents
Quick Diagnosis: Is It the Remote or the Device?
Before you start tearing apart your remote, you need to figure out whether the problem is actually the remote or the device it controls. This five-second test saves you from wasting time fixing the wrong thing.
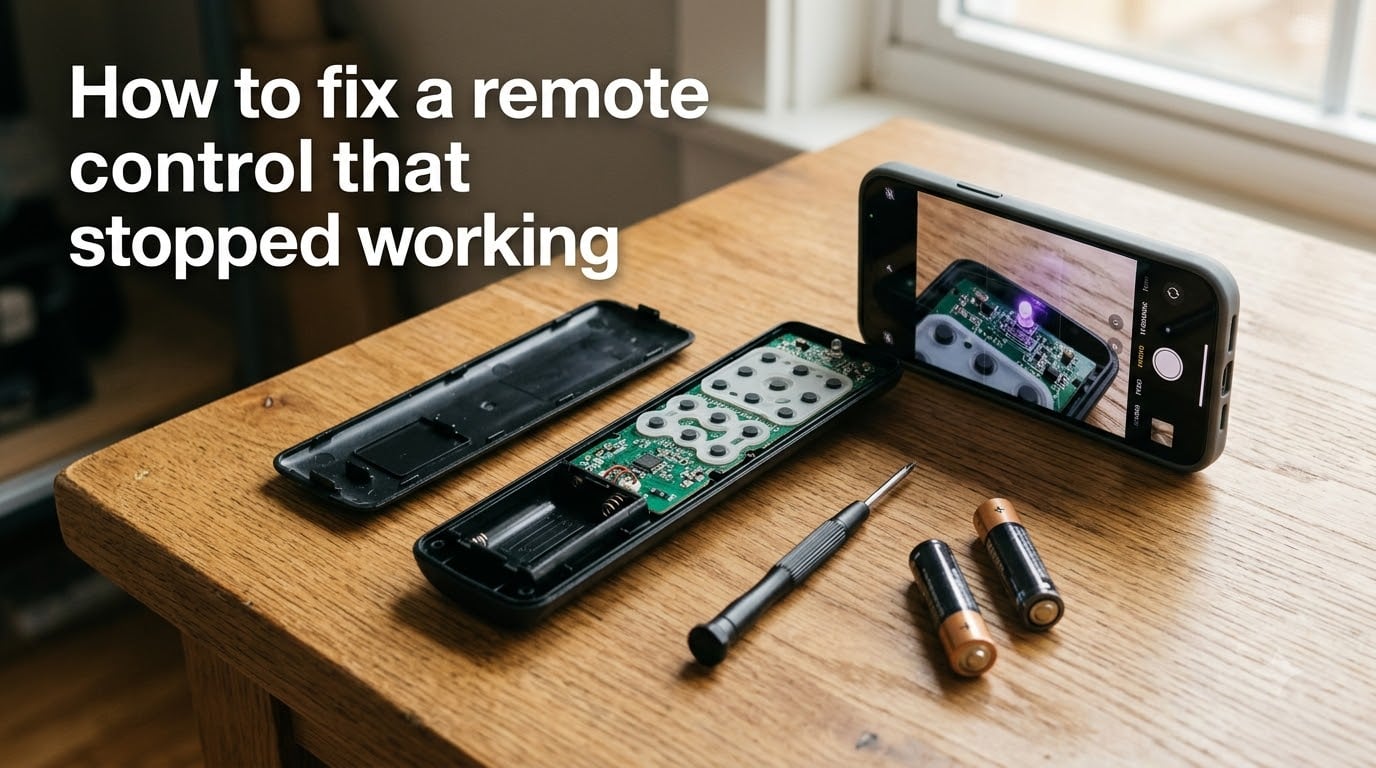
The fastest way to test your remote is with your smartphone camera. Open your phone’s camera app, point the top of the remote (the IR emitter) directly at the lens, and press any button. If you see a faint pinkish or purple light flash on your phone screen, your remote is sending an infrared signal and the problem is likely with your TV or device. If you see no light at all, the remote itself is the culprit.
This phone camera trick works because digital cameras can see infrared light that is invisible to the human eye. It is hands-down the most reliable quick test recommended by both repair technicians and Reddit users across communities like r/LifeProTips and r/AskElectronics.
If the remote is sending a signal but the device still does not respond, try using the physical buttons on the TV itself. If those work, the IR receiver on your device may be blocked, dirty, or failing. If neither the remote nor the buttons work, you are looking at a device-side issue that may require a power reset or professional repair.
Step 1: Replace the Batteries (Do This First)
It sounds obvious, but dead or weak batteries account for the majority of remote control failures. Even if your remote was working yesterday, batteries can drain rapidly from a stuck button or internal short. Start here before trying anything else.
Remove the old batteries and inspect them for any signs of leakage or corrosion. If you see white or greenish powder around the terminals, that is battery leakage, and you will need to clean the contacts before new batteries will work. We will cover that in the next step.
Install a fresh set of batteries, making sure to match the positive and negative markings in the battery compartment. Do not mix old and new batteries, and do not mix different brands. Mixing batteries at different charge levels can cause the weaker one to leak or even rupture, which will damage your remote further.
One quick tip from forum users: if you only have one good battery and one weak one, you are better off using two equally weak batteries temporarily than mixing. The voltage difference between a fresh and partially depleted battery causes problems. Ideally, just grab a fresh pair.
After installing new batteries, test the remote with the phone camera trick again. If you now see the IR light, problem solved. If not, move on to cleaning the contacts.
Step 2: Clean the Battery Contacts
Battery corrosion is one of the most common reasons a remote stops working, even with brand-new batteries installed. The metal contact points inside the battery compartment can accumulate oxidation, grease, and corrosive buildup from leaking batteries. This creates a barrier that prevents electrical current from flowing properly.
Start by removing the batteries and examining the metal springs and flat contacts inside the compartment. Look for white, green, or bluish crust, which indicates battery leakage and corrosion. Even a thin layer of oxidation from humidity over time can block the connection.
For corrosion, dip a cotton swab in white vinegar or lemon juice. The mild acid dissolves the alkaline buildup from leaked batteries. Gently scrub the contacts until the corrosion is gone, then wipe with a dry cloth. For general grime and oxidation, use 90 percent isopropyl alcohol on a cotton swab. It cuts through oils and evaporates quickly without leaving residue.
If the contacts are heavily corroded, you can gently scrape them with a small flathead screwdriver or a piece of fine-grit sandpaper. Be careful not to bend the spring contacts out of shape. The goal is to expose clean, shiny metal that makes solid contact with the battery terminals.
Let everything dry completely for a few minutes before reinstalling batteries. Even a tiny amount of moisture can cause intermittent problems. Once dry, insert fresh batteries and test again.
Step 3: Perform a Power Reset on Your TV or Device
Sometimes the remote is perfectly fine, but the device has a software glitch that stops it from responding. A power reset clears these issues by draining residual electricity from the device’s capacitors and forcing a fresh boot.
Unplug your TV or device from the wall outlet completely. Do not just turn it off with the power switch, as that may leave some internal components energized. Wait a full two minutes for the capacitors to fully discharge. This wait is important because shorter periods may not fully clear the issue.
While you wait, press and hold the power button on the device itself for 30 seconds. This helps drain any remaining charge. After the two minutes are up, plug the device back in and turn it on. Test your remote again.
Sony specifically recommends this power reset procedure in their official troubleshooting guide, and it resolves a surprising number of issues. Software updates can sometimes cause the TV to stop recognizing remote commands, and the reset forces it to reload those communication protocols from scratch.
If your remote works for some functions but not others after the reset, there may be a firmware or settings issue on the device. Check for software updates in your TV’s settings menu, as manufacturers regularly release patches that fix remote communication bugs.
Step 4: Clean the Rubber Keypad and Circuit Board
If specific buttons have stopped working while others still function, the problem is almost certainly inside the remote. Over months and years of use, the rubber keypad accumulates skin oils, dust, and sticky residue that interfere with the electrical contacts on the circuit board.
Start by removing the batteries. Most remotes open by removing a single screw in the battery compartment and then prying the two halves apart. Use a small flathead screwdriver or a plastic pry tool to separate the shell gently. Work your way around the edges to avoid breaking the plastic clips that hold it together.
Once open, you will see the rubber keypad and the green circuit board underneath. The keypad has conductive carbon pads on the back of each button. These pads complete a circuit on the board when pressed. Dirt and oil on these pads or on the board traces prevent the circuit from closing.
Remove the rubber keypad and wash it in warm soapy water. Dish soap works well because it cuts through skin oils effectively. Rinse thoroughly and let it dry completely. For the circuit board, use a cotton swab dipped in isopropyl alcohol to gently clean the gold contact traces. Do not scrub hard, as you can damage the thin conductive coating.
Reddit users in r/Frugal and r/howto confirm that this deep cleaning resolves most sticky and unresponsive button issues. Let all parts dry fully before reassembly. Even trace moisture between the keypad and circuit board can cause phantom button presses or shorts.
Step 5: Restore Worn-Out Button Contacts (The Aluminum Foil Trick)
This is the fix that most guides skip, and it is the one that can actually save a remote that seems beyond repair. Over years of use, the black conductive coating on the back of rubber buttons wears away. When the coating is gone, pressing the button no longer completes the circuit, and the button stops working entirely.
You can test whether this is your problem by pressing the worn button while touching a small piece of aluminum foil to the contact pad on the circuit board. If the button works with the foil, the conductive coating is worn and the foil trick will fix it.
Here is how to do the aluminum foil repair. Cut tiny squares of aluminum foil, roughly 4 to 5 millimeters on each side. You only need one square per dead button. Apply a tiny dot of superglue to the back of the rubber button pad where the old conductive coating used to be. Place the foil square on top of the glue, shiny side down, and press gently for 10 seconds until the glue sets.
Be careful with the amount of glue. Too much superglue can seep through the foil and prevent it from conducting electricity. Use a toothpick to apply a very thin layer. The foil needs to make direct contact with the circuit board traces when the button is pressed.
Let the glue cure for at least 10 minutes before reassembling the remote. Once dry, put everything back together, reinstall the batteries, and test. This trick has been verified by hundreds of DIY repair enthusiasts online and can extend the life of a remote by years. It works particularly well for frequently used buttons like power, volume, and channel controls.
For a more permanent and professional fix, you can also buy conductive paint or conductive adhesive made specifically for rubber keypad repair. These products contain silver or carbon particles that recreate the original conductive surface. They cost a few dollars more than foil but provide a more durable repair.
Step 6: Fix Smart Remote Pairing Issues
Modern smart remotes from Samsung, LG, Roku, and Apple TV do not use infrared. They connect via Bluetooth or Wi-Fi, which means they can lose their pairing connection after a software update, battery change, or power outage. If your smart remote stopped working suddenly, pairing is the first thing to check.
For Samsung smart remotes, hold the Return and Play/Pause buttons simultaneously for 5 to 8 seconds until a light on the remote flashes. Point it at the TV and wait for the pairing confirmation message on screen. If that does not work, try holding the Back and Home buttons instead, as Samsung has used different button combinations across remote generations.
For LG Magic Remote, hold the Home and Back buttons together for about 5 seconds until the light blinks, then point it at the TV. LG also recommends unpairing and re-pairing by going into the TV’s settings menu under General, then System, then Remote Management. Removing the remote from the paired devices list and re-pairing from scratch often resolves persistent connection issues.
For Roku remotes, open the battery compartment and look for a small pairing button inside. Press and hold it for 3 seconds until the pairing light starts flashing. Wait for the on-screen pairing dialogue to complete. If the remote still will not pair, restart your Roku device by unplugging it for 10 seconds, then try pairing again.
Always check for firmware updates on both your TV and remote after re-pairing. Manufacturers frequently release patches that fix Bluetooth communication bugs. A remote that worked fine for months can suddenly lose connection after a TV update that changes the Bluetooth protocol.
When to Replace vs Repair Your Remote
Not every remote can be saved. After trying all the steps above, you may need to face the fact that replacement is the better option. Here is how to decide.
If the circuit board is cracked, physically broken, or has water damage with visible corrosion on the internal components, repair is generally not worth the effort. Water-damaged boards often have microscopic shorts that cause intermittent problems even after cleaning. You will spend hours chasing ghost issues.
If only one or two non-essential buttons are dead and everything else works, you can often live with it or use the aluminum foil trick we described above. But if the power button or directional pad is dead and cannot be repaired, the remote is effectively useless.
For older IR remotes that are no longer manufactured, universal remotes are an excellent replacement option. They cost between $10 and $25 and can control multiple devices. Most modern universal remotes are programmable via simple code entry or auto-scan features that find your TV automatically.
The cheapest immediate solution is to use your smartphone as a remote. Both Android and iPhone have free remote control apps that work over Wi-Fi. Samsung SmartThings, LG ThinQ, Roku, and Apple TV Remote apps all turn your phone into a fully functional replacement. This is a great stopgap while you decide whether to repair or replace.
Common Remote Control Problems and Quick Fixes
Here is a quick-reference breakdown of the most common remote symptoms and what they usually mean.
Remote works intermittently: This is almost always dirty contacts or weak batteries. Start with fresh batteries, then clean the compartment contacts with isopropyl alcohol. If the problem persists, open the remote and clean the circuit board contacts.
Specific buttons do not work but others are fine: The conductive coating on those specific buttons has worn away. Use the aluminum foil trick or conductive paint to restore the contacts. This is the most common fix for power and volume buttons that get the most use.
Remote light blinks but device does not respond: The remote is sending a signal, so the problem is on the device side. Check for obstructions in front of the IR receiver, perform a power reset on the TV, or check if a firmware update is needed.
Remote completely dead, no light at all: Start with new batteries. If still nothing, clean the contacts for corrosion. If the remote has no visible damage and still shows no sign of life, the internal circuit board or a solder joint may be cracked.
Smart remote stopped working after battery change: The remote lost its Bluetooth pairing. Re-pair it using the brand-specific button combination we outlined earlier. Always re-pair immediately after changing batteries.
Remote works only when very close to the TV: The IR LED on the remote is weakening or the TV’s IR receiver is dirty. Clean the small IR window on both the remote and the TV. Weak batteries can also reduce the effective range significantly.
FAQs
What causes a TV remote to suddenly stop working?
The most common causes are dead or weak batteries, corroded battery contacts, worn-out button contacts on the rubber keypad, lost Bluetooth pairing for smart remotes, and IR receiver issues on the TV itself. Software updates can also disrupt remote communication. Start by testing with the phone camera trick to determine if the remote is sending a signal.
How to revive a dead remote?
Replace the batteries first, then clean the battery contacts with isopropyl alcohol or vinegar if there is corrosion. If specific buttons are dead, open the remote and clean the circuit board contacts, or use the aluminum foil trick to restore worn button pads. For smart remotes, re-pair the Bluetooth connection using the manufacturer’s button combination.
What causes a remote control to stop working?
Remote controls stop working due to depleted batteries, oxidized or corroded battery contacts, accumulated dirt and oils on the circuit board, worn conductive coating on rubber keypads, lost pairing for Bluetooth smart remotes, and physical damage to the circuit board. Environmental factors like humidity and battery leakage are leading causes of contact corrosion.
Why is my remote not working even with new batteries?
New batteries will not fix corroded contacts, a dirty circuit board, or worn button pads. Remove the batteries and inspect the metal contacts inside the compartment for white or greenish corrosion. Clean them with vinegar on a cotton swab, then wipe with isopropyl alcohol. If only certain buttons fail, the conductive coating on those buttons is likely worn and needs the aluminum foil repair.
How do I fix remote control buttons that don’t work?
Open the remote, remove the rubber keypad, and clean the circuit board contacts with isopropyl alcohol. If the conductive black coating on the back of specific buttons is worn away, cut small squares of aluminum foil and glue them to the button pads with a tiny drop of superglue. This restores the electrical connection when the button is pressed.
Can I use my phone as a remote control replacement?
Yes. Most major TV brands offer free remote apps for Android and iPhone. Samsung SmartThings, LG ThinQ, Roku, and Apple TV Remote all work over Wi-Fi and provide full remote functionality. These apps are excellent temporary solutions while you repair or replace your physical remote.
Conclusion
Learning how to fix a remote control that stopped working is one of those practical skills that pays off every single time. Most remote failures boil down to a handful of common causes: dead batteries, corroded contacts, dirty circuit boards, worn button pads, or lost pairing connections. Each one is fixable at home with basic household items.
Start with the simple stuff. Swap the batteries, clean the contacts, and do the phone camera test to narrow down the problem. If those do not work, move on to the deeper fixes like cleaning the rubber keypad and circuit board or restoring worn button contacts with the aluminum foil trick. For smart remotes, re-pairing the Bluetooth connection solves most sudden failures.
Remember that not every remote can be saved. If the circuit board is cracked or water-damaged, replacement is the better call. Universal remotes and smartphone apps are affordable alternatives that can bridge the gap while you shop for a permanent replacement.
Save this guide for the next time a remote goes dark. The fix is almost always faster and cheaper than you expect.