
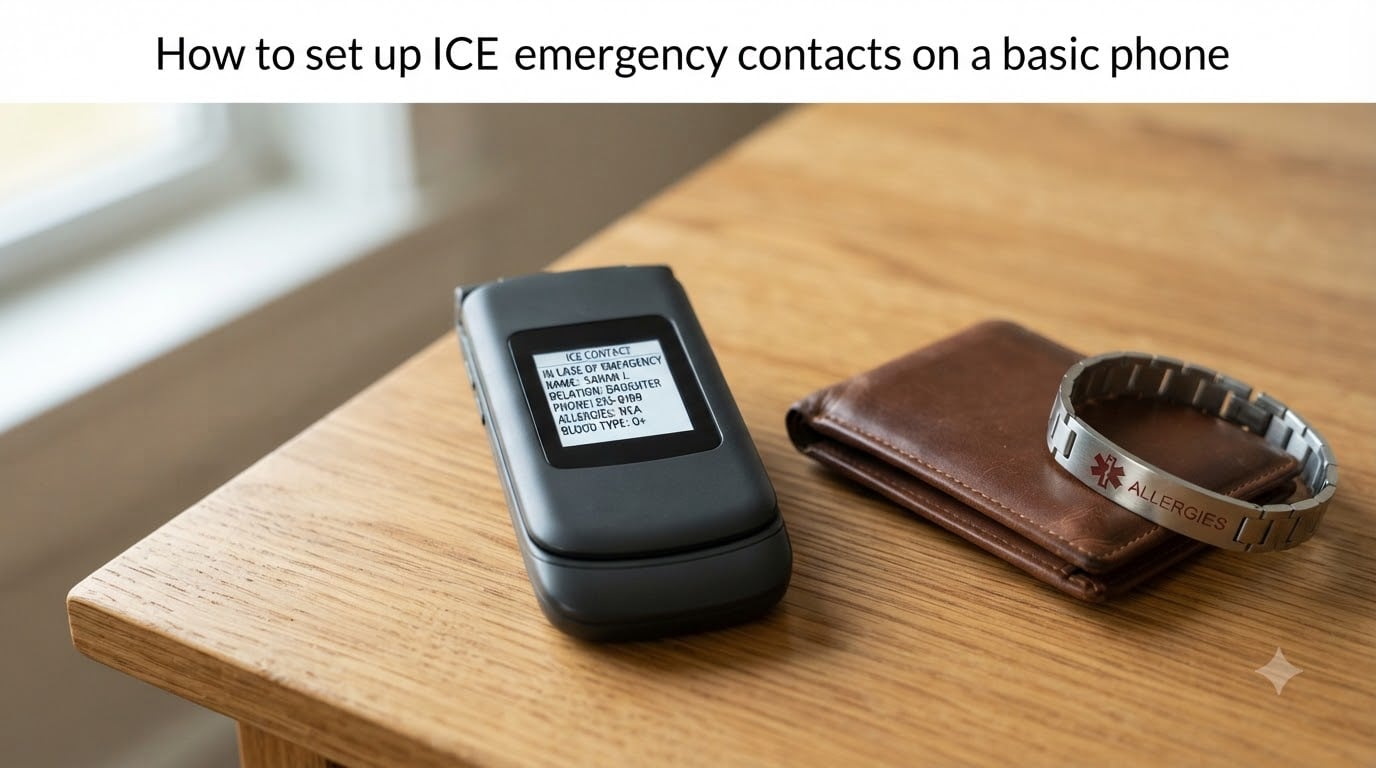
If you carry a basic phone or feature phone, you might think emergency contact setup is something only smartphone users can do. That is not true. Learning how to set up ICE emergency contacts on a basic phone is one of the most practical safety steps you can take, and it does not require apps, internet access, or a data plan.
ICE stands for “In Case of Emergency.” It is a simple system that tells first responders, paramedics, or bystanders who to contact if you cannot speak for yourself. On a basic phone, you can set this up using a few creative workarounds that take less than ten minutes.
I have helped several family members, including elderly parents with flip phones, set up ICE contacts over the years. The methods below are the ones that actually work on non-smartphone devices, and I will walk you through each step.
Table of Contents
What Is ICE and Why It Matters?
ICE stands for “In Case of Emergency.” The concept was originally popularized by a British paramedic named Bob Brotchie in 2005. The idea is simple: store emergency contact information on your phone so that responders can find it quickly if you are unconscious, disoriented, or otherwise unable to communicate.
First responders and hospital staff sometimes check a patient’s phone for emergency contacts. While they do not always do this (more on that limitation later), having ICE information visible and easy to find increases the chances that the right people get called fast.
For basic phone users, this matters even more. Basic phones do not have Medical ID apps, Health apps, or lock-screen emergency shortcuts built into the operating system. That means you need to use manual methods to make your ICE information visible without unlocking the device.
The good news is that these methods work on virtually any phone, from a flip phone to a candy-bar style handset. No internet connection or app installation required.
How to Set Up ICE Emergency Contacts on a Basic Phone (Wallpaper Method)
The wallpaper method is the most reliable way to set up ICE emergency contacts on a basic phone. It works because the lock screen wallpaper is visible without unlocking the phone, so any responder can see your information at a glance.
Here is the step-by-step process:
Step 1: Write down your ICE information. Before touching your phone, write out exactly what you want displayed. Keep it short. Include the word “ICE” followed by your emergency contact’s name and phone number. Add a second contact if you have one. For example: “ICE – Jane Smith – 555-0123. ICE2 – Tom Smith – 555-9876.”
Step 2: Create the text as an image. Since basic phones cannot type custom text onto a wallpaper directly, you need to create the text as an image file. The easiest way is to use a computer. Open a simple text editor or document program, type your ICE information in large, bold, readable text on a white background, then take a screenshot of it. You can also use a free online tool like Canva or even a phone note app on someone else’s smartphone.
Step 3: Transfer the image to your basic phone. Most basic phones accept images via Bluetooth, USB cable, or MMS (picture message). Send the image file to your phone using whichever method works. If your phone has a microSD card slot, you can also copy the image onto a card and insert it.
Step 4: Set the image as your wallpaper. Open the image on your phone, press the Options or Menu key, and select “Set as wallpaper” or “Set as background.” On many basic phones, you can find this under Settings then Display then Wallpaper.
Step 5: Lock your phone and check the screen. Press the lock button and look at the screen. Your ICE information should be visible immediately without entering a PIN or unlock code. If the text is too small or cut off, go back and adjust the image.
Step 6: Test it with someone unfamiliar. Hand your locked phone to a friend or family member and ask them to find your emergency contact information. If they can read it within five seconds, your setup works.
What to Put on Your ICE Wallpaper?
Keep the information on your ICE wallpaper brief and focused. A cluttered screen is hard to read in an emergency. Here is what our team recommends including, in order of importance:
Essential items: The word “ICE” in all caps, your primary emergency contact’s name, their phone number, and a secondary ICE contact with name and number.
Medical information to add if you have space: Blood type, known allergies (especially to medications like penicillin), critical medical conditions such as diabetes or epilepsy, and any medications you take regularly.
Optional but helpful: Your full name and date of birth. If you are a senior or have a serious medical condition, adding this helps responders confirm your identity quickly.
Do not include sensitive information like your Social Security number, home address, or financial details. Keep it strictly to what a responder needs in a medical situation.
Adding ICE to Your Phone Contacts List
In addition to the wallpaper method, you should add ICE contacts directly into your phone’s contacts list. This gives responders a second way to find your information if they access the phone’s address book.
Open your contacts list and create a new contact. Name it “ICE” followed by the contact’s name, for example “ICE Jane Smith.” Enter their phone number and save. If your phone allows it, add a note field with any medical conditions or allergies.
Create a second contact called “ICE2” with your backup emergency contact. Some basic phones sort contacts alphabetically, so contacts starting with “ICE” will appear near the top of the list where they are easy to find.
This method has a limitation: contacts are usually only visible after the phone is unlocked. That is why the wallpaper method should always be your primary setup. The contacts list serves as a backup.
How to Set Up ICE on an iPhone (Medical ID Method)
If you also use an iPhone or are considering upgrading from a basic phone, the Medical ID feature is the most powerful ICE tool available. It is accessible from the lock screen without unlocking the phone.
Step 1: Open the Health app on your iPhone.
Step 2: Tap your profile picture in the top right corner, then tap “Medical ID.”
Step 3: Tap “Edit” in the top right corner.
Step 4: Turn on “Show When Locked” at the top. This is the critical setting that makes your information visible on the lock screen.
Step 5: Add your emergency contacts by tapping “add emergency contact” and selecting people from your contacts list.
Step 6: Fill in your medical conditions, allergies, medications, and blood type.
Step 7: Tap “Done” to save.
To access Medical ID from a locked iPhone, press the side button and home button (or volume buttons on newer models), tap “Emergency,” then tap “Medical ID.”
How to Set Up ICE on an Android Phone (Emergency Info Method)
Android phones have a similar feature called Emergency Information or Emergency SOS. The exact menu names vary by manufacturer (Samsung, Google, Motorola, etc.), but the process is similar across devices.
Step 1: Open the Settings app.
Step 2: Scroll to “Safety & emergency” or “Emergency information” (on Samsung devices, look under “Apps” then “Contacts” then “Groups” for ICE).
Step 3: Tap “Emergency information” and then “Edit information.”
Step 4: Enter your name, address, blood type, allergies, medications, and medical notes.
Step 5: Tap the “Contacts” tab within Emergency Information and add your emergency contacts.
Step 6: Make sure “Show on lock screen” or “Lock screen” is enabled so the information is accessible without unlocking.
From a locked Android phone, swipe up on the lock screen, tap “Emergency call,” then tap “Emergency information” twice to view medical details and contacts.
Who to List as Emergency Contacts
Choosing the right emergency contacts is just as important as the technical setup. The wrong person listed as an ICE contact can cause delays during a crisis.
Your primary ICE contact should be someone who knows your medical history, can make decisions on your behalf, and answers their phone reliably. A spouse, adult child, parent, or longtime partner is usually the best choice.
Your secondary ICE contact should be someone different, in case the primary contact is unreachable. Consider a sibling, close friend, or other relative who lives nearby.
Important: tell your contacts they are listed. This is a commonly overlooked step I see repeatedly in forum discussions on Reddit. People listed as ICE contacts often miss the call because they do not recognize the number or think it is spam. Tell your contacts directly that they are your ICE contacts and ask them to answer calls from unknown numbers.
If you have a specific medical condition, consider adding your doctor or specialist as a third contact. Some people also list their pharmacy for medication verification.
How to Test Your ICE Setup?
Setting up ICE contacts is only useful if they actually work when needed. Testing your setup takes two minutes and catches problems before a real emergency does.
Test 1: The lock screen check. Lock your phone and look at the screen without unlocking it. Can you see your ICE contact names and numbers clearly? Is the text large enough to read from arm’s length? If not, redo your wallpaper image with bigger text.
Test 2: The stranger test. Hand your locked phone to someone who has never seen it. Ask them to find your emergency contact information. Time how long it takes. Under 10 seconds is the goal. If they struggle, your setup needs adjustment.
Test 3: The call test. From another phone, dial your ICE contact number exactly as it appears on your wallpaper. Make sure the number is correct and connects to the right person. I have seen cases where a digit was transcribed incorrectly and the number went to a stranger.
Common mistakes to avoid: Using a phone number that is out of date, making the text too small to read on a small basic phone screen, forgetting to transfer the ICE wallpaper when getting a new phone, and listing contacts who do not know they are listed.
Backup Options: Wallet Cards and More
Phones can run out of battery, get damaged in an accident, or go missing. No ICE setup on a phone is foolproof. That is why physical backups matter.
ICE wallet card: Create a small card the size of a credit card with your ICE information printed on it. Include the word “ICE,” your emergency contacts’ names and numbers, your blood type, allergies, and critical medical conditions. Keep it in your wallet or purse next to your ID.
You can make this card by hand on an index card trimmed to size, or print one using a free template. Many local health departments and hospitals offer free printable ICE card templates on their websites.
Medical alert jewelry: For people with serious conditions like diabetes, severe allergies, or epilepsy, a medical alert bracelet or necklace provides a permanent, phone-independent way to communicate critical information. Paramedics are trained to look for these.
Refrigerator list: Keep a visible list of emergency contacts and medical information on your refrigerator at home. Emergency responders who respond to a house call often check the refrigerator for this information.
Limitations of ICE on Basic Phones
Being honest about what basic phones can and cannot do with ICE is important. Basic phones do not have a dedicated, operating-system-level emergency information system like smartphones do.
The wallpaper method works, but it has limits. If your phone’s screen breaks in an accident, the wallpaper is unreadable. If the battery dies, no ICE information is accessible at all. And unlike a smartphone’s Medical ID, a wallpaper cannot be updated automatically or linked to a national emergency database.
Paramedics and EMTs discuss on forums like Reddit whether they actually check phones for ICE contacts. The consensus is mixed. Some do, some do not, and it often depends on the situation and the individual responder. This is why combining phone-based ICE with a wallet card and medical alert jewelry gives you the best coverage.
Despite these limitations, having ICE information on your basic phone is still far better than having nothing at all. It takes ten minutes to set up and costs nothing.
FAQs
How do you set up an ICE contact on a basic phone?
To set up an ICE contact on a basic phone, create a text image with your emergency contact’s name and phone number starting with the word ICE, transfer the image to your phone, and set it as your lock screen wallpaper. This makes the information visible without unlocking the phone. You should also add ICE contacts to your phone’s contacts list using the name format ICE followed by the person’s name.
Can emergency contacts be accessed when a basic phone is locked?
On a basic phone, the only way to make ICE contacts visible when the phone is locked is to display them on the lock screen wallpaper. Unlike smartphones, basic phones do not have a built-in Medical ID or Emergency Information feature that can be accessed from the lock screen.
What does ICE mean on a cell phone?
ICE stands for In Case of Emergency. It is a system where you store emergency contact information on your phone so that first responders, paramedics, or bystanders can quickly contact your loved ones if you are unable to communicate in an emergency.
Do emergency responders actually check phones for ICE contacts?
Some emergency responders do check phones for ICE contacts, but it is not guaranteed. Paramedics and EMTs on forums like Reddit report mixed practices. This is why you should combine phone-based ICE information with a physical wallet card and, for serious medical conditions, medical alert jewelry.
What information should I include in my ICE setup?
Include the word ICE, your emergency contacts’ names and phone numbers, your blood type, known medication allergies, critical medical conditions, and current medications. Keep the information brief and focused on what a responder needs in a medical emergency. Do not include sensitive personal details like your Social Security number.
Conclusion
Knowing how to set up ICE emergency contacts on a basic phone gives you a simple but powerful safety net. The wallpaper method, combined with ICE entries in your contacts list and a physical wallet card, ensures that first responders can reach your loved ones even when you cannot speak for yourself.
Take ten minutes today to set this up. Write your ICE information, create the wallpaper image, transfer it to your phone, and test it. Then tell the people you listed so they know to answer. Your future self, and your family, will be glad you did.