
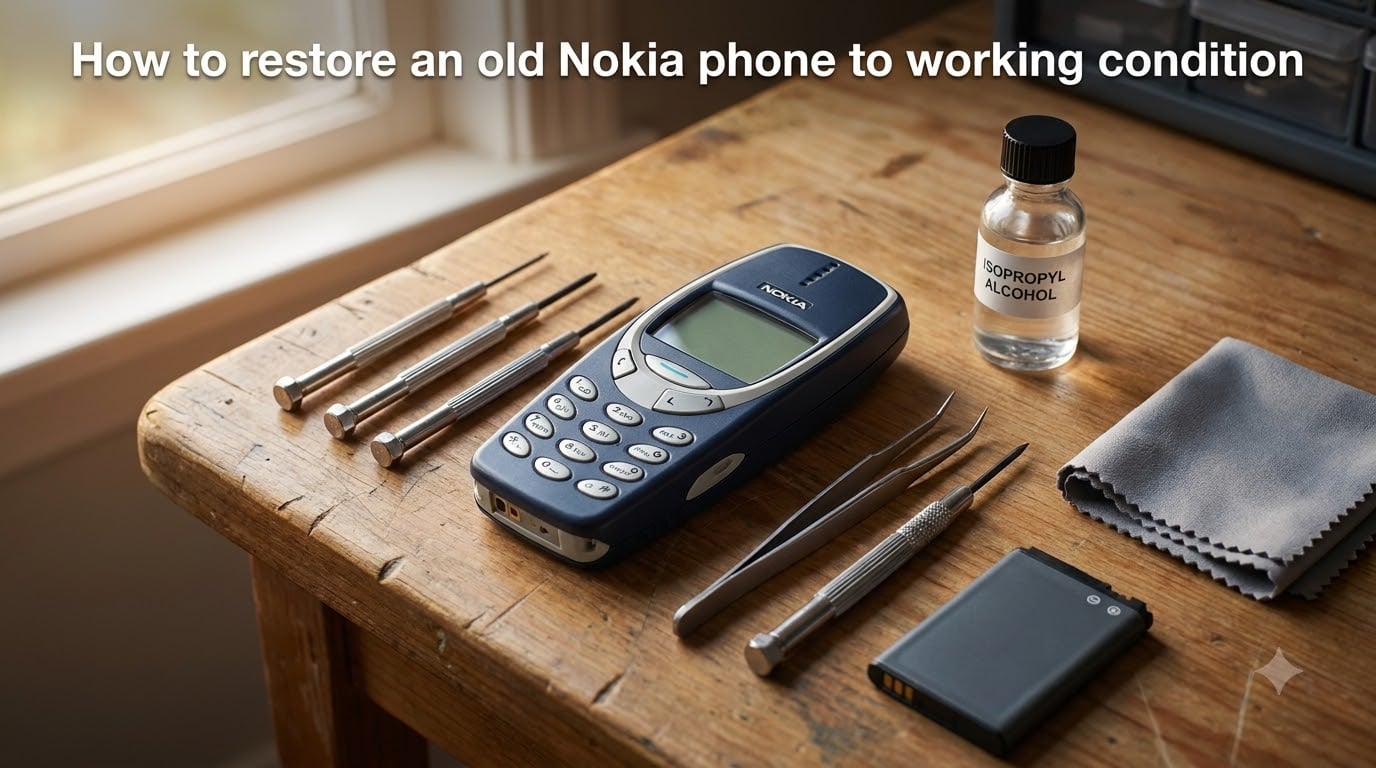
I still remember the day I dug my Nokia 3310 out of a drawer after 12 years in storage. The plastic was yellowed, the battery was swollen, and the charging port looked like something off the floor of a garage. Two hours later, that brick phone was making calls again. Restoring an old Nokia phone to working condition is one of the most satisfying DIY projects you can do, and it is far easier than most people think.
This guide walks you through the exact process I use on Nokia 1100, 3310, 3410, and other classic models. You will learn what tools you need, how to safely handle old batteries, how to clean charging ports, and how to perform software resets that fix frozen phones. Whether you are reviving a backup device, restoring a collector’s piece, or just curious about retro tech, you will find everything you need below.
Table of Contents
Can Old Nokia Phones Still Work?
Yes, old Nokia phones can absolutely still work in 2026. Models from the late 1990s and early 2000s were built like tanks, and many still function today with basic care. I have personally revived Nokia 3310 units that sat in attics for 15+ years. The hardware is durable, the components are simple, and replacement batteries are widely available.
Three things usually stop a vintage Nokia from working: a dead or leaking battery, corroded charging contacts, or a software lock from forgotten security codes. All three are fixable without specialized tools. The only scenarios where restoration fails are physical board damage, missing antennas, or liquid corrosion that ate through the main circuit board. For everything else, a successful restore is realistic within an afternoon.
Safety Precautions Before You Start
Old lithium-ion and nickel-metal hydride batteries can be dangerous if mishandled. Before you do anything else, inspect the battery for swelling, leaks, or a strong chemical smell. A swollen battery means it needs disposal at an e-waste facility, not a trash can. Never puncture, bend, or heat an old battery.
Work in a well-ventilated area, especially when cleaning contacts with isopropyl alcohol. Wear nitrile gloves if you are handling corroded batteries or leaking cells. Keep a fire extinguisher rated for chemical fires nearby. If your battery is bulging or punctured, place it in a bucket of sand until you can take it to a recycling center.
Disconnect the phone from any charger before opening the case. Static electricity can damage the circuit board, so touch a grounded metal object before handling internal components. These small habits prevent the most common accidents during Nokia phone restoration.
Tools You Will Need
You do not need a professional workshop to restore an old Nokia phone. Here is the basic kit I keep on my bench for vintage phone work.
Small Phillips and Torx screwdrivers (sizes T5, T6, T7 for Nokia cases)
Plastic pry tools or guitar picks for opening clips without scratching the housing
Isopropyl alcohol (90% or higher) for cleaning contacts and circuit boards
Cotton swabs and a soft toothbrush for scrubbing corrosion
Replacement battery matched to your specific Nokia model
Multimeter for testing voltage and continuity
Compressed air for clearing dust from the keypad membrane
Microfiber cloth for the screen and outer shell
Retr0bright or hydrogen peroxide gel (optional) for whitening yellowed plastic
Total cost for a starter kit is typically under $30 if you already have a multimeter. iFixit and similar retailers sell dedicated Nokia repair toolkits for around $20 that include the right screwdriver bits.
Identifying Your Nokia Model
Before ordering parts, confirm exactly which Nokia model you have. The model number is printed under the battery, on a sticker inside the battery compartment, or engraved on the back housing. Common models you will encounter include the Nokia 1100, 1110, 1200, 2300, 3310, 3330, 3410, 5110, 6210, and 8250.
Once you have the model number, search online for the service manual. iFixit has free teardown guides for over 100 Nokia models, and PDF manuals are widely available on archive.org. Knowing your exact model helps you source the right battery (BL-5C, BL-4C, BLB-3, and similar codes vary by phone) and find torque specs if you need to open the case further.
For collector value, certain models command higher prices: the Nokia 3310 (2000), Nokia 8110 (1996 banana phone), and Nokia 8800 (2005) are particularly desirable. Cosmetic condition matters more than electronics for these models.
Step-by-Step Restoration Process
This is the core process I follow to restore an old Nokia phone to working condition. Take your time with each step, especially the cleaning stages.
Step 1: Remove the Battery and SIM Card
Power down the phone completely and remove the battery. Take out the SIM card as well. Inspect both for corrosion on the gold contacts. If you see green or white residue, clean it gently with a cotton swab dipped in isopropyl alcohol.
Step 2: Open the Housing
Most Nokia phones from this era clip together without screws on the front shell. Insert a plastic pry tool into the seam near the bottom of the phone and gently work your way around the edges. Apply steady, even pressure to avoid snapping the plastic clips. If you meet strong resistance, stop and check for a hidden screw.
Step 3: Inspect the Circuit Board
With the phone open, look for any obvious damage: burnt components, bulging capacitors, white or green corrosion around the battery terminals, or water stains on the board. Take a photo so you remember where each component sits. Use compressed air to blow out dust from the keypad membrane and speaker grille.
Step 4: Clean the Charging Port
The charging port is the most common failure point on vintage Nokia phones. Dip a toothbrush in isopropyl alcohol and scrub the port thoroughly, focusing on the metal contacts. For stubborn corrosion, use a wooden toothpick to scrape gently. Allow the alcohol to evaporate fully before reassembly.
Step 5: Replace the Battery
Install a fresh, compatible battery. Even if your old battery still holds a charge, replacement batteries for old Nokias are inexpensive and dramatically extend the phone’s usability. Quality third-party batteries from reputable sellers work fine.
Step 6: Power On and Test
Insert the SIM card, attach the battery, and connect the charger. Leave it on charge for at least 30 minutes before attempting to power on. This brings the battery to a safe voltage level. Then press and hold the power button for 5 seconds.
Step 7: Perform a Software Reset
If the phone powers on but behaves erratically, perform a factory reset using the secret codes in the next section. This clears software glitches that often appear after years of storage.
Battery Replacement Guide
Battery issues cause the majority of Nokia restoration problems. Old batteries leak acid, lose capacity, or swell up and damage the battery compartment. Before buying a new battery, test your current one with a multimeter. A healthy Nokia BL-5C battery should read between 3.6V and 4.2V when fully charged. Anything below 2.5V means the battery is dead and unsafe.
To replace the battery, slide off the back cover, lift out the old battery, and insert the new one with the contacts aligned. Charge fully before first use. Avoid cheap no-name batteries from unknown sellers; they often have lower capacity than rated and can fail within months. Stick with recognized brands sold on major platforms.
If the old battery leaked, clean the battery compartment with a cotton swab dipped in white vinegar first, then neutralize with isopropyl alcohol. Allow the compartment to dry completely before installing a new battery. Leakage left untreated will corrode the new battery contacts within weeks.
Charging Port Cleaning and Repair
Old Nokia phones used two main charging standards: the small round Nokia pop-port charger on older models and the micro-USB on later models. Both can be cleaned, but the technique differs slightly. For pop-port chargers, use a wooden toothpick to gently scrape inside the port. For micro-USB, use a SIM ejector tool or thin plastic pick to clean the inner contacts.
If cleaning does not restore charging, the charging IC on the motherboard may be damaged. This is a more advanced repair that involves soldering a replacement chip. The IC responsible is usually labeled on the board and can be sourced from electronics suppliers. Unless you have soldering experience, this is the point where professional help makes sense.
A 30-minute inspection saves hours of frustration later. Check for bent pins, broken solder joints around the charging port, and any sign of heat damage. These are the issues that prevent the phone from recognizing a charger.
Software Reset Procedures and Secret Codes
Nokia phones have a set of built-in service codes that handle diagnostics, resets, and configuration. These work on most models from the 1990s and 2000s. Enter the codes from the home screen with the SIM inserted.
*#7370# – Performs a factory reset (soft format). Resets all settings and clears user data.
*#7780# – Restores factory settings without deleting user data.
*#2640# – Displays the phone’s security code status and active locks.
*#06# – Shows the device IMEI number.
*#0000# – Displays the firmware version.
*#92702689# – Opens the service menu (lifetime timer, manufacturing date, hardware version).
If your phone asks for a security code you do not remember, the default code on most older Nokia phones is 12345. If that does not work, you can reset it using a master code calculator available through Nokia phone forums, though this is a last resort because it voids any warranty on the device.
Troubleshooting Common Issues
The Phone Will Not Turn On
Most power issues come down to three causes: a dead battery, a corroded charging port, or a tripped power IC. Test the battery voltage first. If the battery reads above 3.6V, the issue is likely the charging port or power button. Clean the port and try again. If still no response, the phone may need a power IC reflow, which requires professional repair.
The Phone Turns On But Shows Nothing on Screen
A blank screen with backlight working usually means the flex cable connecting the display to the motherboard is loose. Open the phone and reseat the cable. If the screen shows garbled graphics, the flex cable is damaged and needs replacement. For the Nokia 3310 and similar models, replacement displays are widely available.
The Phone Will Not Charge
If cleaning the charging port does not help, test the charger with another phone. If the charger works elsewhere, the issue is the phone’s charging circuit. Check for broken solder joints around the port and reflow them with a hot air station if you have the equipment.
The Keypad Does Not Respond
Stuck or unresponsive keys on old Nokias are almost always caused by dirty keypad membranes. Remove the keypad, clean both the membrane and the contact pads with isopropyl alcohol, and reassemble. If specific keys still fail, the membrane itself may be torn and need replacement.
No Sound or Distorted Audio
Check the speaker grille for debris and clean it with compressed air. If audio is still muffled, the speaker may be failing. Replacement speakers for popular Nokia models cost a few dollars and are straightforward to swap with a soldering iron.
Cosmetic Restoration Tips
Yellowed plastic is the most visible sign of age on a vintage Nokia. The yellowing comes from UV exposure breaking down the bromine in the plastic. Two methods work well to reverse it: retr0bright (a hydrogen peroxide-based gel) or simple sunlight exposure.
For retr0bright, make a paste from hydrogen peroxide (12% concentration), xanthan gum, and a small amount of glycerin. Apply it to the yellowed plastic, wrap the parts in plastic wrap, and leave them in direct sunlight for 4 to 8 hours. The plastic will return to near-original color. Rinse thoroughly afterward.
For screens with minor scratches, use a small amount of toothpaste (not gel) on a microfiber cloth and rub in circular motions. Deep scratches need professional polishing or screen replacement. Scuffs on the outer housing can be buffed out with fine-grit sandpaper (2000+ grit) followed by plastic polish.
Missing keycaps can be sourced from donor phones on eBay or from specialized parts suppliers. Keep an eye out for broken units with intact housings; they are gold mines for restoration parts.
When to Seek Professional Help?
Some repairs go beyond basic DIY. If the phone has visible water damage with white residue across the motherboard, swollen capacitors that have leaked electrolyte, or a cracked flex cable under BGA chips, take it to a specialist. Mobile phone repair shops with experience in vintage hardware can usually handle these cases for a reasonable fee.
iFixit has a directory of independent repair technicians and a community forum where you can ask specific questions about your model. For rare or valuable collector phones, the cost of professional restoration is usually worth it to preserve value.
Do not attempt board-level repairs without proper training and equipment. A single mistake with a hot air station can destroy traces that cannot be repaired. Knowing when to stop is just as important as knowing how to start.
FAQs
Can old Nokia phones still work in 2026?
Yes. Many Nokia phones from the 1990s and 2000s still work today if the battery is replaced and the charging port is clean. Hardware from this era was built to last, and replacement parts are widely available.
My old Nokia phone is not turning on. What could be the problem?
The most common causes are a dead battery, corroded charging contacts, or a software lock. Test the battery voltage with a multimeter, clean the charging port with isopropyl alcohol, and try a fresh battery first. If the phone still does not respond, the power IC on the motherboard may be damaged.
How do I reboot an old Nokia phone?
Remove the battery for 30 seconds, then reinsert it and press the power button. If the phone is frozen on a logo screen, perform a factory reset using the code *#7370# from the home screen. The default security code is 12345.
What can I do with an old Nokia phone?
Use it as a backup phone, a music player, an offline camera, or a dedicated device for calls and texts. Restored Nokia phones are popular among collectors, retro tech enthusiasts, people seeking a digital detox, and anyone who needs a reliable device with long battery life.
What is *#7370# in Nokia phones?
*#7370# is a factory reset code that restores the phone to its original settings and clears all user data. It is useful when the phone is misbehaving or after years of storage when software glitches appear. Enter it from the home screen with the SIM inserted.
Conclusion
Restoring an old Nokia phone to working condition is a rewarding project that combines nostalgia with practical skills. In most cases, all you need is a fresh battery, a clean charging port, and a software reset. The tools are inexpensive, the parts are widely available, and the process takes only a few hours.
If you have an old Nokia sitting in a drawer, this is your sign to dig it out and bring it back to life. Start with the basics from this guide, work through the steps carefully, and you will likely end up with a working phone that still makes calls in 2026. For tougher repairs, the iFixit community and vintage phone forums are excellent resources for model-specific advice.