
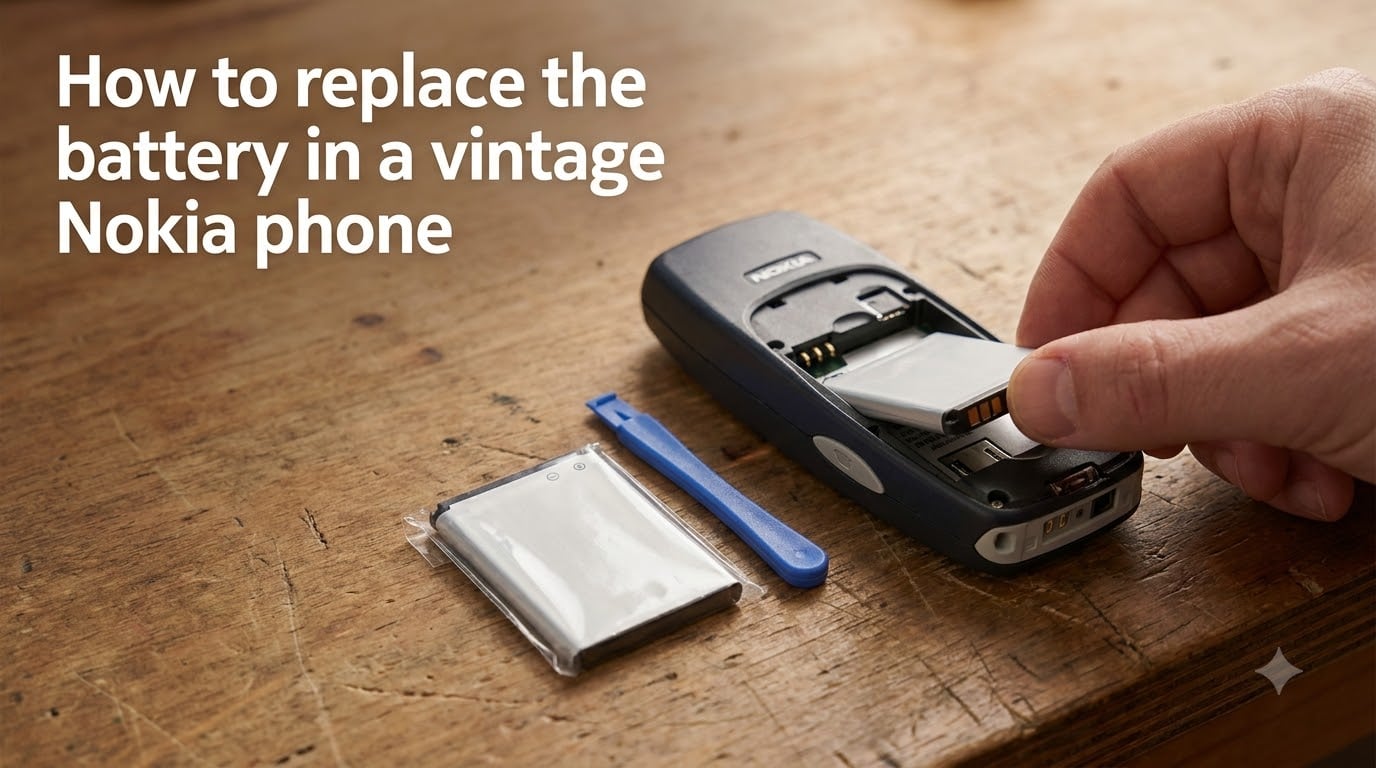
I still remember pulling my old Nokia 3310 out of a drawer after 15 years and wondering if I could bring it back to life. The answer was yes, and the battery swap took less than five minutes. If you are looking at your own vintage Nokia and asking whether it still works, you are in the right place.
Learning how to replace the battery in a vintage Nokia phone is one of the simplest electronics repairs you can do. These phones were built for user-serviceable batteries, meaning no glue, no heat guns, and no special tools. You just need the right replacement cell and a few minutes of patience.
Our team has restored several classic Nokia models, from the legendary 3310 to the 6200 Classic. In this guide, I will walk you through every step, share the battery model numbers you need, and cover the troubleshooting tricks that forum users swear by.
Table of Contents
What You Will Need?
The beauty of vintage Nokia phones is that battery replacement requires almost no tools. Here is what to gather before you start.
Required:
A compatible replacement battery (see the compatibility section below for the exact model number)
Your vintage Nokia phone, powered off
Optional but helpful:
A plastic pry tool or guitar pick for stubborn back covers
A microfiber cloth to wipe dust from the battery compartment
A SIM card removal tool or paperclip, if you plan to check the SIM slot
That is it. No screwdrivers, no adhesives, no heat. Nokia designed these phones so anyone could swap a battery in seconds.
How to Replace the Battery in a Vintage Nokia Phone
Here is the full step-by-step process for replacing a vintage Nokia battery. These instructions work for the Nokia 3310, 3390, 6200 Classic, 2760, and dozens of similar models from the late 1990s through the 2000s.
Step 1: Power Off the Phone
Before doing anything, make sure the phone is completely powered off. Hold the power button until the screen goes dark. If the battery is already dead, you can skip this step.
This matters because removing the battery while the phone is running can corrupt data stored on the device. On vintage Nokias, that means contacts, text messages, and game high scores.
Step 2: Turn the Phone Face Down and Locate the Back Cover
Flip the phone so the screen faces down on your surface. Look at the back of the phone. You will see the removable battery cover, which takes up most of the rear panel.
Nokia used two main types of back cover mechanisms. Identifying which one yours uses is the key to opening it without breaking anything.
Step 3: Open the Back Cover
For latch-release covers (Nokia 3310, 3390, and similar blocky models): Look for a small release latch or button at the top or bottom edge of the back cover. Press the latch downward with your thumb while sliding the cover toward the bottom of the phone. The cover should release and slide off.
For slide-off covers (Nokia 6200 Classic and many candy-bar models): Locate the small groove or indentation on the back cover, usually near the bottom edge. Press your thumb into the groove and push the cover downward, toward the charging port. Apply steady pressure until it slides free.
For stubborn covers: If the cover has not been removed in years, it may be stiff. Use a plastic pry tool along the edge to gently loosen it. Never use metal tools, as they can crack the plastic casing.
Once the cover slides off, set it aside. You will now see the battery sitting in its compartment.
Step 4: Remove the Old Battery
Look for the small indentation or finger groove next to the battery, typically at the bottom edge of the battery compartment. This is the lift point Nokia designed for easy removal.
Place your fingernail or fingertip into the indentation and lift the battery upward, away from the phone body. The battery should pop out with minimal force. If it feels stuck, check whether a small metal retention clip is holding it in place and gently push the clip aside.
Take a moment to inspect the battery. If you see any swelling, leakage, white crusty deposits, or corrosion on the contacts, set it aside for proper disposal. Do not reuse a damaged battery under any circumstances.
Step 5: Note the Battery Orientation
Before inserting the new battery, pay close attention to the orientation of the old one. Vintage Nokia batteries have three or four gold contact points on one edge. These contacts must line up with the corresponding contact points inside the phone.
Most Nokia battery compartments have a small diagram printed inside showing the correct direction. The battery model number and the contacts typically face down into the phone, while the label side faces up toward you.
Step 6: Insert the New Battery
Hold the new replacement battery at the same orientation you noted in Step 5. Slide the contact edge in first, lining up the gold connectors with the phone’s contact points. Press the opposite edge down gently until the battery sits flat in the compartment.
The battery should fit snugly without forcing it. If it does not sit flush, double-check the orientation. Forcing an incorrectly oriented battery can bend the contact pins and damage the phone.
Step 7: Replace the Back Cover
Align the back cover with the rails on the phone body. Slide it upward (or press it down, depending on your model) until it clicks into place. You should hear or feel a satisfying snap when the latch engages.
Give the cover a gentle tug to confirm it is secured. A loose cover can let dust into the battery compartment over time.
Step 8: Charge and Test
Connect your Nokia charger and let the phone charge for at least 30 minutes before trying to power it on. New replacement batteries often ship with a partial charge, but vintage phone chargers deliver power slowly by modern standards.
After charging, press and hold the power button. If the screen lights up and you see the Nokia boot screen, your restoration is a success. Make a test call if you have an active SIM card and 2G network coverage in your area.
Finding a Compatible Replacement Battery
This is where many people get stuck. Vintage Nokia phones used specific battery model numbers, and you need to match the right one to your phone. Using the wrong battery can mean a loose fit, incorrect voltage, or simply no power at all.
Common vintage Nokia battery models:
BLR-4S / BLR-4C: Used in early models like the Nokia 5110, 5146, and 6150 (NiMH, 3.6V)
BMC-3: Used in the Nokia 3310, 3330, and 3410 (NiMH, 2.4V, 900 mAh)
BLD-3: Used in the Nokia 6510, 8310, and 8210 (Li-ion, 3.7V, 830 mAh)
BL-4UL: Used in later vintage models and some refreshed 3310 variants (Li-ion, 3.7V)
BL-5CB: Used in the Nokia 105 and other late-era basic phones (Li-ion, 3.7V, 800 mAh)
The easiest way to find your correct battery is to read the model number printed on your old battery. If the label has worn off, look up your phone model online or check the battery compartment for a printed compatibility code.
Where to Buy Replacement Batteries
Forum users on Reddit’s r/vintagemobilephones and r/Nokia have shared a consistent frustration: aftermarket batteries from random sellers often die within hours of charging. I have seen this complaint dozens of times, and it is the single biggest issue people face when restoring a vintage Nokia.
Here is what our team recommends based on community feedback:
Specialty retro tech stores: Online retailers that specialize in vintage phone parts often stock tested, decent-quality cells. These tend to be more reliable than generic marketplace listings.
eBay (reputable sellers): Look for sellers with high ratings who specialize in phone batteries. Check recent reviews for battery-specific feedback.
Amazon: Search for your exact battery model number. Read one-star reviews carefully, as they often reveal whether the batteries hold a charge over time.
Batteries Plus: This US retailer carries Nokia replacement batteries and offers in-store installation if you have a location nearby.
Be aware that genuine original Nokia batteries are nearly impossible to find for long-discontinued models. Most replacements on the market today are aftermarket manufactured cells. Set your expectations accordingly, and buy from sellers with return policies.
Troubleshooting Common Issues
Sometimes a new battery is not enough to bring a vintage Nokia back to life. Here are the most common problems and how to diagnose them.
Phone Will Not Turn On After Battery Replacement
First, confirm the battery is inserted in the correct orientation. The gold contacts must align perfectly. If they do, let the phone charge for a full hour before trying again. Many replacement batteries ship completely discharged and need time to reach minimum voltage.
If the phone still does not respond after an hour of charging, the issue is likely the charger, not the battery. Nokia’s old 2mm barrel chargers are notoriously fragile. Test with a known-working charger if possible.
Battery Will Not Hold a Charge
This is the most common complaint about aftermarket batteries. If your replacement dies after only a few hours, you likely got a low-quality cell. Unfortunately, this is widespread with cheap aftermarket Nokia batteries in 2026.
Try cycling the battery by fully charging and fully discharging it three times. Some aftermarket cells need a few cycles to reach their stated capacity. If there is no improvement after cycling, request a refund and try a different seller.
Old Battery Will Not Take a Charge at All
If you are trying to revive the original battery that sat unused for 10 or 15 years, it is probably beyond saving. NiMH batteries from the late 1990s and early 2000s degrade permanently when left discharged for years. The internal chemistry breaks down, and no amount of charging will bring them back.
In this case, skip the original battery and go straight to a replacement. This is normal and expected for vintage electronics.
Phone Turns On But Drops Calls or Resets
If the phone boots up but randomly restarts or drops calls, the battery contacts may be dirty. Remove the battery and gently clean the gold contact points inside the phone with a cotton swab and a tiny amount of rubbing alcohol. Let it dry completely before reassembling.
Safety Tips for Handling Old Batteries
Before you throw that old battery in the trash, there are a few safety things to know. Vintage Nokia batteries contain materials that need proper handling.
Inspect for damage: Look for swelling, bulging, leaking fluid, or white/green corrosion on the contacts. A swollen battery means the internal cells have failed and are producing gas. Handle it carefully and dispose of it immediately.
Never do these things:
Never puncture, crush, or disassemble an old battery
Never throw a battery in a fire or incinerator
Never put a battery in regular household trash
Never mix old damaged batteries with new ones in storage
Proper disposal: Take old Nokia batteries to a battery recycling drop-off. Most electronics stores, hardware stores, and municipal waste facilities accept small batteries for recycling at no charge. In the US, Call2Recycle maintains a free drop-off locator for rechargeable batteries.
Will Your Vintage Nokia Still Work? The 2G Shutdown
This is the question everyone asks after getting their old Nokia working again. The honest answer depends entirely on where you live and what your local carriers have done with their 2G networks.
Many countries have already shut down or are phasing out 2G networks in 2026. The US completed its 2G sunset, and carriers in Australia, Canada, and parts of Europe have followed or are following suit. Without a 2G network, your restored Nokia cannot make calls, send texts, or connect to any cellular service.
However, the phone still has value even without network access. Collectors display them, hobbyists use them for offline games like Snake, and some people keep them as emergency phones that can still dial emergency services in regions where that is supported on unregistered devices.
Check with your local carriers to see if 2G service is still available in your area before investing in restoration purely for daily use.
Frequently Asked Questions
Can you replace a Nokia phone battery?
Yes, you can replace a vintage Nokia phone battery. Most models from the 1990s and 2000s have a removable back cover and a user-replaceable battery. No tools are required for the majority of models. You simply remove the back cover, lift out the old battery using the finger indentation, insert a compatible replacement, and close the cover.
How to fix an old Nokia phone that won’t turn on?
Start by replacing the battery with a new compatible one, as old NiMH and lithium-ion batteries permanently degrade after years of disuse. If a new battery does not work, check that the gold contacts inside the phone are clean. Try a different charger, as vintage Nokia barrel chargers often fail over time. Charge the phone for at least one full hour before attempting to power it on, since replacement batteries often ship fully discharged.
How much is the original Nokia battery?
Genuine original Nokia batteries for vintage models are nearly impossible to find new and are no longer manufactured. Aftermarket replacements typically cost between 8 and 20 dollars depending on the model and seller. Specialty retro tech retailers may charge more for tested cells. Avoid unusually cheap batteries, as forum users consistently report that ultra-low-cost replacements fail within hours.
Can a different battery work in a 3310?
No, you should only use the battery model designed for your specific Nokia phone. The Nokia 3310 uses the BMC-3 battery, which has specific voltage, size, and contact alignment requirements. Using a different battery model can result in a loose fit, incorrect voltage, bent contact pins, or no power at all. Always match the battery model number printed on your original battery.
Are old Nokia phones still usable?
Old Nokia phones can still be powered on and used for offline functions like games, calculator, and alarm clock. However, their usability as actual phones depends on 2G network availability in your area. Many countries have shut down 2G networks in recent years, which means vintage Nokias can no longer make calls or send texts in those regions. Check with your local carrier to confirm whether 2G service still exists where you live.
Conclusion
Replacing the battery in a vintage Nokia phone is one of the easiest electronics repairs you will ever do. No tools, no glue, no specialty knowledge. You remove the back cover, lift out the old battery, drop in a compatible replacement, and close it back up. The entire process takes about five minutes.
The harder part is finding a quality replacement battery in 2026, since genuine Nokia cells are no longer made and aftermarket quality varies wildly. Buy from reputable sellers, check reviews carefully, and be prepared to cycle the battery a few times to reach full capacity. If one replacement does not work, try a different seller before giving up on the phone.
Now that you know how to replace the battery in a vintage Nokia phone, pull that old handset out of the drawer and give it a new lease on life. Whether you are adding it to a collection, reliving the Snake II high-score chase, or just enjoying the satisfaction of bringing old tech back, the process is genuinely rewarding.
If this guide helped you bring a Nokia back from the dead, I would love to hear about it. And if you run into a problem I have not covered here, the troubleshooting section above should help you narrow down whether it is a battery issue, a charger issue, or something else entirely.